Adding a User
Access the User Information screen to view and update current user statuses.
Use the following sections to create a new Zenly user.
User Status and Contact
Setup the user status and contact information.
-
Select the USERS tab.
-
Click New.

- Select the Active radio button to activate the new user.
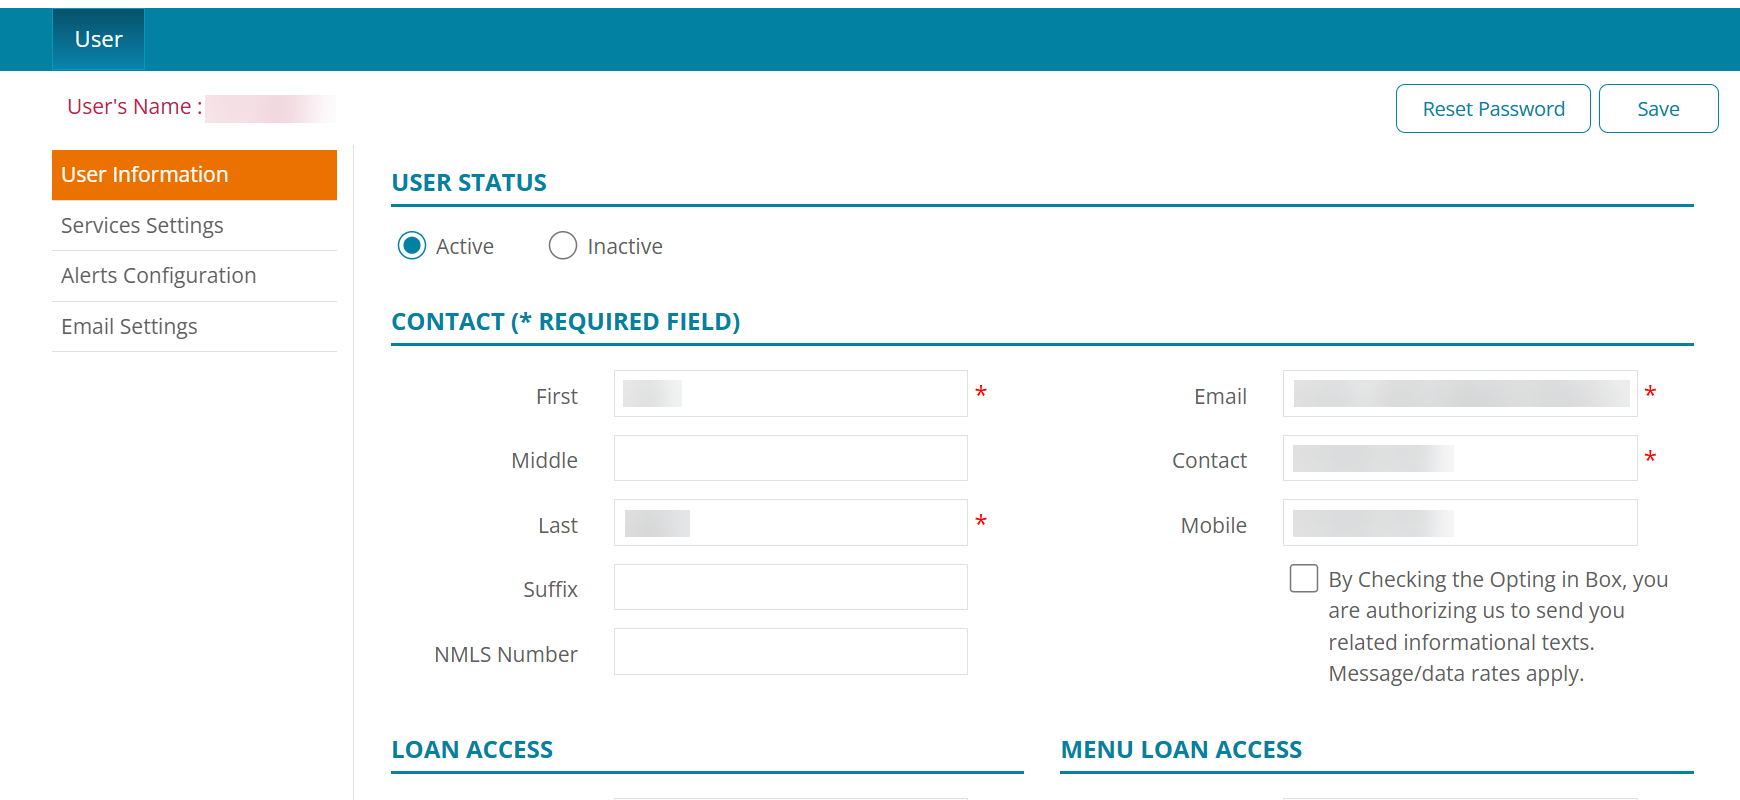
Note: Select Inactive to establish the user without activating user ability to access Zenly.
-
Enter First name.
-
If needed, enter a Middle name.
-
Enter Last name.
-
Enter the Login Name if applicable.
-
Enter Email.
-
Enter Phone number.
-
Enter Mobile number.
-
Enter NMLS Number if applicable.
-
If needed, select the By Checking the Opting in Box....
Note: By opting into the informational texts, the user is provided with an additional method for sending password change requests.
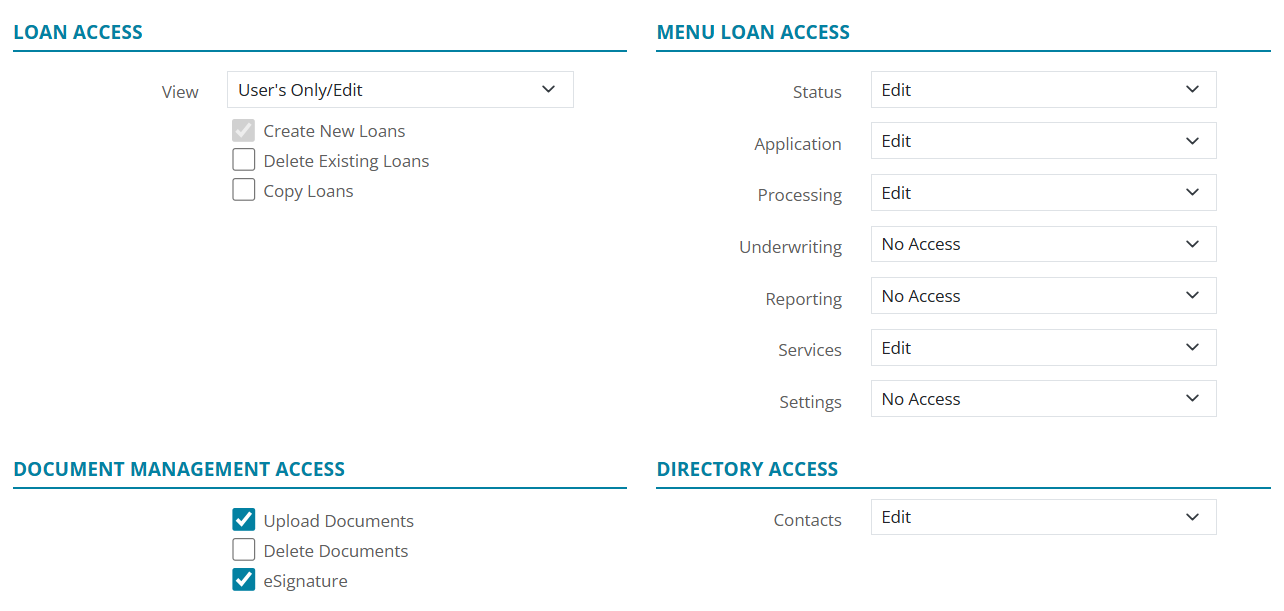
Loan Access
Set the options for determining which loans to which the user has access and the type of access granted.
- Select the appropriate Loan Access View option.
-
All/Edit: Select to enable user to view and edit all loans.
-
All/Read Only: Select to enable user to view all loans.
-
User’s Only/Edit: Select to enable user to view and edit assigned loans.
-
Check the Create New Loans checkbox to enable the user to create new loans.
-
Check the Delete Existing Loans checkbox to enable user to delete loans from Zenly.
-
Check the Copy Loans checkbox to enable users to copy existing Loan/Lead files.
Marketing Access
Allows the Admin to grant specific access to items in the Marketing tab. Select the desired checkboxes.
-
All/Edit: Select to enable user to view and edit every user's marketing campaign.
-
All/Read Only: Select to enable a user to view marketing campaigns and removes the ability to create one.
-
User’s Only/Edit: Select to enable user to view and edit the user's own marketing campaigns.
Document Management Access
Set the user document management options.
-
Select the Upload Documents checkbox to enable the user to upload documents to Zenly.
-
Select the Delete Uploaded Documents to enable user to delete documents from Zenly.
-
Select the eSignature checkbox to enable user to capture borrower/co-borrower electronic signatures.
Menu Loan Access
The options selected for Menu Loan Access determine the Zenly tabs to which the user has access and the level of assigned access. Different access options may be set for different tabs. Options include:
-
No Access: Removes the tab from user view and prevents the user from performing the action.
-
Read Only: Enables information viewing without editing capabilities.
-
Edit: Enables user to make changes to tab information.
-
Select the appropriate Status option.
-
Select the appropriate Application option.
-
Select the appropriate Processing option.
-
Select the appropriate Underwriting option.
-
Select the appropriate Reporting option.
-
Select the appropriate Services option.
-
Select the appropriate Settings option.
Directory Access
Enable or disable the user's ability to edit contacts.
-
Read Only: Enables information viewing without editing capabilities.
-
Edit: Enables user to make changes to tab information.
User Profile
Admins can configure User Profiles to allow or disallow functions in the menu and for the Interview Portal.
For the User drop-down menu:
-
No Access: Users will not have access to the user profile.
-
Read Only: Users can view the User Profile, but not the ability to edit.
-
Edit: Users have full access to the User Profile.
For the Interview Portal drop-down menu:
-
Disable Site: This option prevents the user from accessing the Interview Portal.
-
Company Managed: This option disables the site for the user.
-
Read Only/Limited Access: This option allows the user to only view the Interview Portal, but not have any editing access.
-
Edit/User Configurable: This option allows the user to have full access to the site.
Administrator Access
Administrator Access permissions determine the administrative actions the user may access.
User
Administrator User options include:
-
No Access: Prevents user from seeing or interacting with administrative options.
-
Read Only: Enables the user to see administrative options.
-
Edit: Enables the user to modify administrative option.
Settings
This permission is available only for specific accounts.
Settings options include:
-
No Access: Prevents the user from seeing or interacting with the Settings option from the User Profile drop-down menu.
-
Read Only: Enables the user to see Settings option.
-
Edit: Enables the user to access the Settings option open the Business Configuration screen.
Templates
Template options include:
-
No Access: Prevents user from using templates.
-
Read Only: Enables the user to access and use templates as-is.
-
Edit: Enables the user to modify and use templates.
-
Select the appropriate Administrator Users option.
-
Select the appropriate Settings option.
-
Select the appropriate Templates option.
State Licenses
Use the State License Add option to upload and add state licenses by the user.
-
Click Add.
-
See Status Defaults for details.
-
Repeat Steps 1 – 2 for additional user state licenses.